
Ceiling Fan Replacement: What It Takes and What It Costs

Replacing a ceiling fan is a short job when the wiring and the ceiling box are right, and a longer one when they are not. The fan itself is rarely the hard part. The hard part is what is above it: a box that can carry a moving load, a ground wire, and a ceiling you can reach safely. In San Diego we replace fans for a published price: a $159 service call that includes the first hour, then $39.75 per 15 minutes. You can see the full rate on our pricing page, and you know it before anyone shows up.
TL;DR
- A like-for-like swap of an existing fan is typically a 60 to 90 minute job, according to Hunter Fan’s installation guide. That fits inside our first hour plus a few 15-minute blocks.
- The ceiling box must be rated for a fan, not just a light. A box that only held a light fixture is the most common reason a simple swap turns into a bigger job.
- Vaulted ceilings, missing ground wires and brand-new wiring are the cases where you want a licensed pro on site, not a ladder and a YouTube video.
- Our price is $159 for the service call including the first hour, then $39.75 per 15 minutes. The fan you bought is the only other cost.
Table of Contents
- Replace the whole fan or just a part?
- What the ceiling has to carry
- Replacing a ceiling fan, step by step
- DIY, electrician or fixture specialist?
- What ceiling fan replacement costs
- Vaulted ceilings and hard-to-reach fans
- Book a fan swap in San Diego
- Before the technician arrives
- FAQ
- Sources
Replace the whole fan or just a part?
Before you commit to a swap, work out whether the old fan is actually finished. Many fan complaints come from one small part.
A fan that hums, runs on only some speeds or stops entirely is often suffering from a failed capacitor, the small component that controls speed. Family Handyman describes a burned-out capacitor as the likely culprit behind those symptoms, and notes the pull-chain switch is the only other part that sets speeds. A wobble is often a balance issue rather than a dead motor. ENERGY STAR advises checking that the blades are aligned and everything is tight, then using a balancing kit if the blades are aligned.
Replacing the whole fan makes sense when:
- The motor is noisy or seized, or the fan is so old that matching parts is a guessing game.
- The fan has no light or remote and you want both.
- The finish is dated and you are replacing it for looks anyway.
- You are moving from a light fixture to a fan, or from a standard fan to a low-profile one because the ceiling is low.
If you are not sure which category you are in, that is a fair thing to ask us when you call. A real person answers at (619) 677-8677, Monday to Friday, 8:00 AM to 5:30 PM.
What the ceiling has to carry
A light fixture hangs still. A fan pulls, twists and vibrates every second it runs. That is why the box matters more than the fan.
ENERGY STAR advises using a UL-listed metal outlet box marked for ceiling-fan use, and says a fixture-replacement job may require replacing the existing electrical box. It also recommends anchoring to a ceiling joist, or using a mounting bracket that spans joists when the joist is not centered, and notes some fans weigh as much as 50 pounds. Hunter Fan’s guide says its fan box should support 70 pounds and that installation must follow national and local electrical codes, with the particular fan’s instructions taking priority.
In practice that gives you a quick look at what you have:
| What is in the ceiling | What it means for the swap |
|---|---|
| Box marked for ceiling-fan use, fixed to a joist or brace | Usually a straightforward like-for-like replacement |
| Plain plastic or light-duty box | Needs replacing with a fan-rated box before a fan goes up |
| Box on drywall only, nothing behind it | Needs added support, such as a brace between joists |
| No ground wire, or brittle old insulation | Needs an electrician’s judgment before anything is connected |
| No wiring at all where the fan will go | A new-wiring job, which is bigger than a replacement |
Hunter Fan says to call a qualified electrician if there is no existing wiring, the box is not fan-rated, you need added switches, or you are uncomfortable working with wiring. Our work is done by licensed electrical contractors, which is exactly the person that list points to.
Replacing a ceiling fan, step by step
Here is the sequence a proper replacement follows, based on the steps in This Old House’s guide. At each step we note where it goes wrong and what we take off your hands.
1. Kill the power and confirm it is dead
Turn off the wall switch and the breaker, then test the wires before you touch them. A wall switch alone is not enough, and a mislabeled breaker panel is common in older homes. What goes wrong: people trust the switch, and the wires are still live. We handle the testing as a normal part of the visit, and you do not have to hunt for the right breaker.
2. Take the old fan down
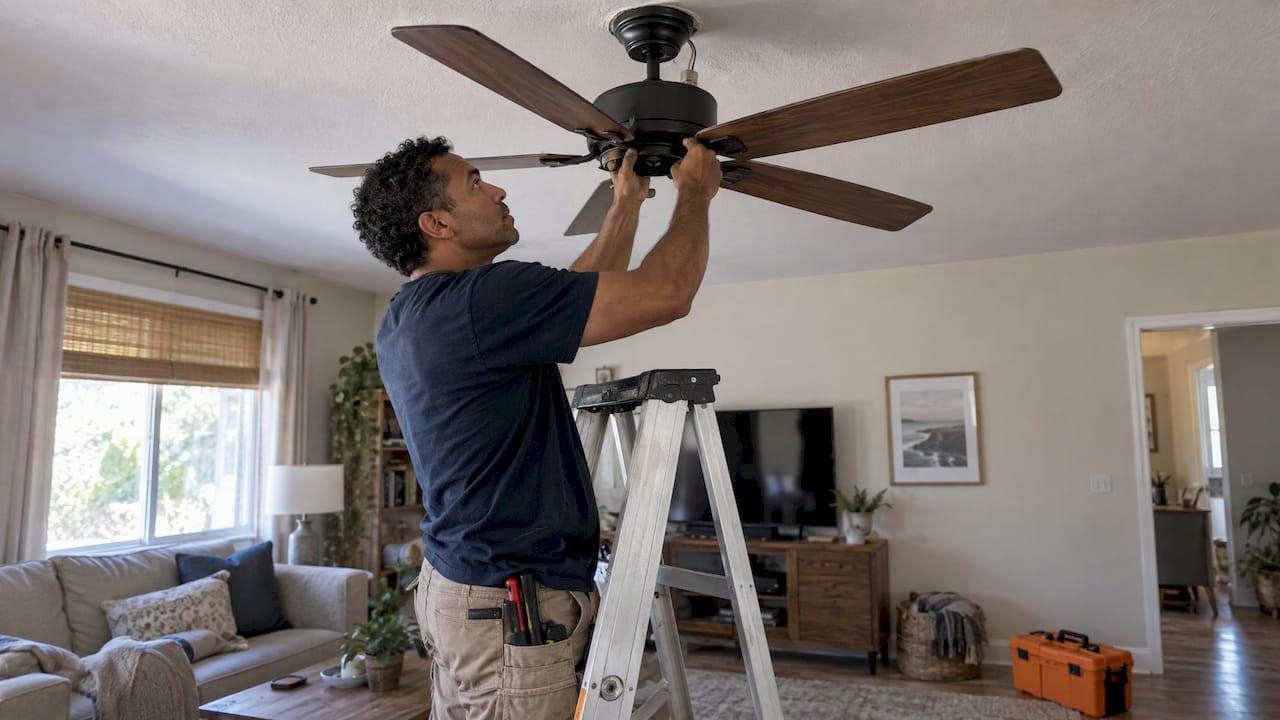
Remove bulbs, glass globes and blades first, so you are lifting the lightest possible assembly. Disconnect the wires, lift the motor off its bracket and remove the bracket. What goes wrong: this is where most falls and dropped fans happen, because you are holding a heavy motor overhead on a ladder. On a vaulted ceiling the ladder is taller and the footing worse. We do this part so you never have to hold the fan overhead, and we protect your floors and furniture while we do it.
3. Inspect what held it
Look at the box and the support. If the hardware is not up to the job, it gets replaced with a fan-rated box or a 2-by-6 brace between joists. What goes wrong: a fan that was happy for years on a weak box can still loosen over time, and a new heavier fan raises the stakes. This is the step that decides whether the job is a swap or a repair, and it is the one where a licensed contractor earns their fee.
4. Mount the bracket and hang the fan
Fasten the new bracket to the box or brace, then hang the motor. Most fans have a hook or cradle that holds the weight while you wire. What goes wrong: a missing washer, a stripped screw or a bracket that does not match the box. You supply the fan you have already bought, and we install it, so you are not left with the last 20 percent of a half-finished job.
5. Connect the wires
Match the ground, neutral and hot conductors, including the separate light wire if the fan has a light kit. Tuck everything into the box without pinching. What goes wrong: swapped wires give you a fan that works but a light that does not, or a light that is always on.
6. Attach the blades, light kit and canopy
Blades go on last, which keeps the motor easy to handle. Check that every blade screw is snug. What goes wrong: loose blade screws are the usual cause of wobble.
7. Restore power and test every setting
Run every speed, the reverse switch, the light and the remote. If the fan wobbles, go back to alignment and tightness, and use a balancing kit if the blades are aligned, as ENERGY STAR advises. Before we leave, the work area is cleaned up.
DIY, electrician or fixture specialist?
A common question is whether you need a full electrician for something that sounds this small. The honest answer depends on what is in the ceiling.
If the wiring and box are in place, the job is a replacement, and a specialist who does fixture swaps all week is the right fit. You do not need to hire a crew or book a remodel. If there is no wiring where you want the fan, or you want a new switch location, the work moves toward new electrical installation, which Hunter Fan itself flags for an electrician.
We sit in the middle on purpose. Switch Your Fixture was started by Matt, a home remodeler of about 20 years who still runs a general contracting business, as a focused fixture-swap service. The installs are done with licensed electrical and plumbing contractors, so a fan job that turns out to need a box change or a wiring correction stays in the same visit.

Permits in San Diego
Whether a permit applies depends on scope. The City of San Diego’s municipal code exempts certain maintenance repairs only when they do not affect electrical or mechanical installations, so it is not a blanket pass for every fan job. If your project adds wiring or a circuit, ask the City’s Development Services Department what applies. Our team can talk through your specific ceiling when you book.
What ceiling fan replacement costs
There are two separate costs: the fan and the labor.
The fan is whatever you choose to buy. Prices run widely by size, motor type, finish and whether it has a light or remote. You pick it, so you control that number.
The labor is where most homeowners get surprised, because many local providers do not publish a rate. Ours is public:
| Item | Price |
|---|---|
| Service call, includes the first hour | $159 |
| After the first hour | $39.75 per 15 minutes |
That means a clean like-for-like replacement that fits in an hour costs $159 in labor. If the box needs replacing or the job runs longer, each additional 15 minutes is $39.75, so you can do the arithmetic yourself before booking. Two fans in one visit, or a fan plus a bathroom light, simply add time at the same rate. The same rate applies across the services we list, from faucets to TV mounting, so a one-visit bundle does not need a separate quote for each item.
Vaulted ceilings and hard-to-reach fans
Vaulted and high ceilings are where homeowners most often stop partway. The fan hangs from a sloped surface, usually on a downrod, and the box has to be set so the fan hangs plumb. Reaching it means a tall ladder, or a scaffold, with a heavy motor in your hands.

If the existing fan is already there, replacing it is still a replacement: same box, same wiring, new fan. The extra work is reach and angle, and that is time, which our rate makes visible. Older homeowners in La Jolla, Mission Hills and Hillcrest often tell us the ladder is the real reason they are calling. That is a good reason. Having a named, licensed technician do the climbing is a normal use of the service, not an extravagance.
See our ceiling fan installation page for the details of what we install.
Book a fan swap in San Diego
We install the fixtures you have already bought, with licensed electrical and plumbing contractors, one published rate across services and a warranty on every installation. We protect work surfaces, clean up after the job, and you can speak with a real person before you book.

If you are replacing a fan along with other fixtures, such as builder-grade lights in a newly purchased home, bundle them into one visit. You can look at our full list of services, see the neighborhood pages for Pacific Beach, North Park or Clairemont, or book online.
Before the technician arrives
A little preparation keeps the visit inside the first hour:
- Have the new fan in the box, with its hardware and instructions. Bring the downrod and remote if they came separately.
- Note the ceiling type and rough height, and tell us if it is vaulted.
- Clear the floor under the fan, and move anything fragile.
- Tell us if the old fan wobbled, flickered or tripped a breaker, since that points to a wiring or box issue.
- If you have a wall control, mention whether it is a standard switch or a fan control.
If your project is a light fixture swap rather than a fan, our guide to installing a light fixture walks through the same logic. For a deeper look at the steps, see our fan installation walkthrough.
FAQ
Can I replace a ceiling fan myself?
Hunter Fan says replacing an existing fan may be a do-it-yourself job when the wiring and fan-rated support are suitable, and estimates 60 to 90 minutes. It says to call a qualified electrician when there is no existing wiring, the box is not fan-rated or you are uncomfortable with wiring. If you would rather not be on a ladder with a heavy motor, we install fans for a $159 service call including the first hour.
How long does a ceiling fan replacement take?
A like-for-like swap of an existing fan runs about 60 to 90 minutes in Hunter Fan’s estimate, and replacing a light fixture with a fan is estimated at one to two hours. A box replacement or a vaulted ceiling adds time. With us, time beyond the first hour is billed at $39.75 per 15 minutes.
Do I need a new ceiling box for a new fan?
Often you do if the old box was made for a light fixture. ENERGY STAR advises a UL-listed metal box marked for ceiling-fan use and notes a fixture replacement job may require replacing the existing box. We check the box during the visit.
Why does my new fan wobble?
Start with alignment and tightness of the blades and mounting. ENERGY STAR says to use a balancing kit if the blades are aligned. If the wobble continues, the mounting support may be the cause, and our installations carry a warranty.
Sources
- How to Install a Ceiling Fan: Step-by-Step DIY Guide, Hunter Fan
- Ceiling Fan Installation and Usage Tips, ENERGY STAR
- How to Replace a Ceiling Fan, This Old House
- How to Install a Ceiling Fan Remote, Family Handyman
- Section 129.0201 Purpose of Building Permit Procedures, City of San Diego